Sunday 27 August 2017

Mini Booklet Video Tutorial

Hi Everyone, 
Michelle back again with a quickie video of the booklet I created in an earlier post, this may be a little easier to follow!


Hope I have inspired you to have a go ....they are so much fun!
Thanks for joining me!

Michelle


Saturday 12 August 2017

"Mini Watercolour Booklet" using the Artified Mixed Media Kit.


Hi everyone Michelle back with a little tutorial using the fabulous Watercolour Mixed Media Kit for August. This kit is an awesome idea if you are just starting out with Mixed media or if you wish to add to your stash. The kit can be used on its own or in combination with any other supplies you have.


Today I will show you how to make a mini book using just the supplies in the kit alone.
I have also made more embellished little gems using bits and pieces from my stash just to give you all an idea of what you can create with this technique and kit as a base.
I did have plans to prepare a process video for you all but I had a few technical issues (I am not really tech savvy....sorry), so that is now delayed, but it will happen I promise!
So as a plan B i took some quick pics with my phone so I apologise for the quality but I am sure you will all get the idea!
Here is what I created with just the kit:

 The front and back covers.
The pages inside.


So what are we waiting for lets get started!

  • First, I wet the watercolour paper using a spray bottle and activated the watercolours I wanted to use. Then using the water brush I splashed away all over the page and watched the magic of watercolours happen, adding water where I wanted the colour to move. Just be careful to use colours that do not create mud ie: colours opposite each other on the colour wheel. 

  • While the page is still wet I used the Gold Marabu Spray (which is just a must have in your stash.....just sayin') using the sprayer from the bottle and also actual spraying. This gives the page a gorgeous shine and mixes with the watercolours brilliantly and also in a beautiful random manner.

  • Once dry I activated the black watercolour and splashed it around the page once again using the water brush. Then dry completely.


  •  Next I used the stamp with a Black Stazon ink pad randomly across the entire page. It looks very busy at this stage but never fear, in small pieces the book will look awesome! 

  • Now to the folding of the book, I shall do my best to explain. With the "patterned" side down fold the paper in half width ways, be sure to really make each fold edge to edge, and make the fold flat by rubbing a hard edge across it, like the handle of scissors or a metal ruler.


  • Take the open top and fold to the folded edge then turn over and do the same with the other side.


  •  You end up with a page that is a "W".


  • Now fold the page in half lengthwise, now you have one page folded so that it is sectioned into eighths. 


  • Refold the page in half following the width ways fold line.
  •  Then cut the page from the folded edge to the centre, so that you now have a cut in the centre of your page when you flatten it out. 
  • Now to fold the book! Fold the page lengthways then move the ends towards each other to make a star shape


  •  Then fold into the book, easy peasy!


  •  The book is now ready to decorate and look how fabulous all the colour looks!

Page1

  •  You can glue the pages into place or use washi tape to seal them together and make it decorative.

Page 2

Last page

Back cover

  • I ripped the vintage book page supplied and used it throughout the book as the start of embellishing the book pages and to form a spine. 


  •  Now time to play with the Stencil. I used the Ink pad and a make up sponge to decorate throughout and on the covers.


And we are done! You can make these books as detailed as you like or as simple as you please, and the best part? No sewing and using only one sheet of paper!


Here are few others I have made using the kit as a basic kit and adding my stash to get a few different looks.


Well that is about it from me for this month, head over to the Artified shop and get yourself a kit and have a play!
And why not show us what you have created with your kit on the new Facebook site
  "Artified's Mixed Media Creations Hub" would love to see what you do!
Till next time my Lovelies, 

Michelle xxx


Friday 4 August 2017

'The Art of Living' by Elisa Ablett - August Watercolour Mixed Media Kit


Hi everyone, 

Elisa here from the design team with my latest creation for Artified - A mixed media Art Journal Page using the awesome products from the  NEW and exciting Mixed Media Kit - August Edition.

The kit is perfect for those wanting to try out new products and also to add to your mixed media stash!

No automatic alt text available.


The link to the Shop for the kit - Head on over to check it out!


August Watercolour Mixed Media Kit


Here is my project - The Art of Living.


Tutorial time 😀


Step 1 - Using the dictionary paper provided cut two feathers either by hand or using a template and also cut a few rectangles (about 5 or 6 ) depending on the size.


Step 2 - Using gesso from your stash, give your feathers and rectangles a coat and let dry


Step 3 - While your feathers are drying, lets start the background! Coat your page with gesso and let dry, then spray your page with the Gold Acrylic Marabu Spray and while wet add drips of colour onto your page from your watercolour palette (the greens, browns, oranges and yellows). With a very wet paintbrush grab your colour and add to the wet areas on the page. Using a heatgun dry and then keep applying colour til you are happy with the page.


Step 4 - Add colour to your feathers and rectangles by spraying each with water. Spray water onto a craft mat and add some of your colour to the water. Then using a paintbrush add colour to the wet area of your feathers and dry using heatgun.


Step 5 - Some paper weaving! cut thin strips about 10cm long and lay the first few on top of each other and then start weaving over and under, doesn't have to be neat. Then spray over the top with the gold Marabu Art Spray and let dry.


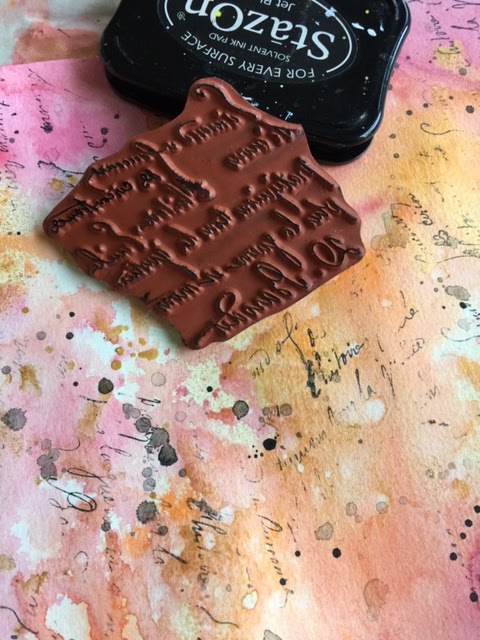
Step 6 - Add some stamping to your rectangles and background page using the stamp and an archival black inkpad and an acrylic block. 

Extra steps - Using the stencil and white modelling paste add texture to your background page
Cut a piece of white cardstock to stick your elements to the background page
Wrap some extra strips of the dictionary paper around a stick and add some ivory coloured cotton
Highlight some words from your dictionary or book paper - i was lucky enough to find the words - The Art of Living!
Stick down your rectangles, paper weaving, stick and feathers as shown in the main photo, overlapping each layer
Grab the thin paintbrush or water brush that comes with your kit and fill it with water, using the black colour add hand painted elements to your page, I added dandelions and grass.

I also used a dauber and a black inkpad through the stencil to add a butterfly to my page.

My theme was to tie in the words The Art of living with natural earth tones and flora and fauna.

Here are some close ups!


That's it from me today! I hope you have enjoyed my Art Journal page tutorial and also looking through the NEW Mixed Media Kit from Artified - Artified August Mixed Media Kit. Make sure you leave me some love!

Also make sure you join the new Artified facebook group to share your creations and keep up to date with all things Artified - https://www.facebook.com/groups/246759415835526/?ref=br_rs